
Disclosure: This post may contain affiliate links, meaning we get a commission if you decide to make a purchase through our links, at no cost to you. Please read our disclosure for more info.
Moving to their own room is a major milestone in every child’s life, but in parent’s life as well. Although we aspire to create independent and capable children, sometimes we find it hard to admit that our help is no longer needed. The truth is, however, the moment a parent stops holding their child’s hand to help them walk, is the moment when they start watching over the kid’s, and that mission never ends. To make the transition to the world of magic called “the kids room” easier, you can design or redesign that room together with your children, and be the superhero mom that makes everything happen. Here are some projects you can do together with your kids.
In This Post:
Adorn the Walls
After you have painted the room, you can call your kid to join you in making it a bit more fun. There are many simple steps in adorning a wall that a child can participate in.
Puffy paint wall sign
This is a simple, fun and very decorative way to make some interesting wall hangings. You will need:
- School/craft glue
- Shaving foam
- Food coloring (of your choosing)
Mix the first two ingredients together (equal amounts) in a ziplock bag, add the food coloring, and squash and shake until you get a homogeneous mass. Give your child a paper to paint on (you can make a layout previously) or let them paint directly on the wall.
A piece of art
Art made by your kid will surely make the room feel more personal and warmer. You can just frame some of the old art class works, but you can also step up the game with:
- Large sheet of watercolor paper
- Watercolors
- Old picture books, comics, magazines…
- Scissors
- Craft glue
You have probably realized by now that we are talking about a mixed media collage. There are no rules here, just have fun painting the paper first and then gluing on some fun images and motifs.
Finally, add a colorful rug that matches the room in order to make it much more fun and cozy. The choice of the rug itself you can leave up to your kids so that they as well can feel all the charms of interior design.
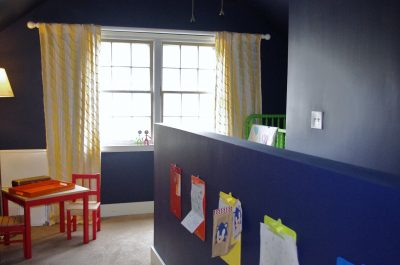
Image Source: flickr.com
A Reading Nook
It is no secret that cultivating the love for books can benefit the child’s mind and academic success. Make that love an everlasting one by creating an amazing space for reading. First, remove the door of a walk-in closet and equip yourself with:
- Shelves (or pine boards you will nail into the closet)
- A mattress
- Abundance of throw pillows
- Fun paint
- Accessories (floor lamp, toys, drawings for the wall, etc.)
If you do not own nails, hammers and similar items, try to find affordable tools online. It is easier than touring around brick & mortar tool stores. Paint the inside of the closet with some fun paint and start arranging the books and hanging the wall art with your kid.
A Place to Stash the Toys
If you have ever stepped on a Lego than you know that every kid’s room must have a toy storage solution. Here are two options.
Under the bed, old drawer storage
Find some old dresser drawers and paint them with vivid colors. Depending on their age, you can allow your child to participate in the painting, or just have them put on stickers afterwards.
Crates storage
You do not even have to hide this one, if you do it right it can be a decoration on its own.
- Crates (1, 2, 3… take as many as you wish)
- White acrylic paint
- Chalkboard spray
Paint the crates white (or in some other color if you wish) and make a chalkboard rectangle with the spray to make a writing space. You can frame that rectangle with pieces of a miniature canvas stand or just leave it that way. Now give your kid a chalk and start organizing the toys.
Up in the Clouds
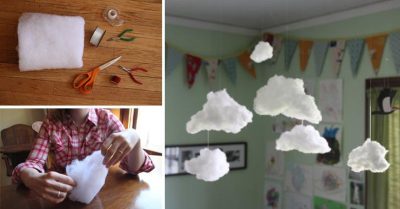
Image Source: weddbook.com
You can make the kids’ room look dreamy and playful by hanging some floating clouds. You will need:
- 4 or 5 packages of polyester stuffing
- 1 roll of fishing line
- Hot glue gun
- Hot glue sticks
- Large, medium and small paper lanterns.
Hot glue the polyester stuffing on the paper lanterns and shape the clouds. Use fishing wire to hang the clouds on the ceiling and enjoy.
We’ve tried to outline some interesting ideas for revamping or designing the kids’ room for the first time. Use these lovely spring days to work on them, together with your kid.